Most small hotel rooms photograph badly not because of the camera but because of the light and the corner you stood in. Open the curtains, turn off the lamps, put your camera in the opposite corner, and shoot slightly underexposed, and a phone in a twelve-by-twelve room looks like a room worth booking. That is the whole trick, and this guide walks through it step by step.
Hotel photography has a name worth knowing: it is hospitality photography. Shots made for a listing page usually fall under real estate and interior photography, while shots made to tell a story for a review or blog are editorial travel photography. The equipment overlaps. The priorities do not, because a guest has roughly twenty minutes and one window, and a hired photographer has a full day and a lighting crew.
I have shot guest rooms in places where the only honest wide angle was the doorway and the only decent light was a corridor window two doors down. What follows is the workflow I actually use to take better travel photos of small hotels and interiors, including the parts that go wrong.
Table of Contents›
- What You Need
- Step-by-Step: How to Photograph Small Hotels and Interiors
- 1. Scout the Space Before You Shoot
- 2. Ask Permission and Check the Shoot Priorities
- 3. Use the Hotel’s Best Light
- 4. Compose Rooms as Stories, Not Empty Boxes
- 5. Shoot a Wide Shot and Several Details
- 6. Edit for Consistency and Accuracy
- The first 20 minutes after check-in
- Common Mistakes and How to Fix Them
- Frequently Asked Questions
- What is hotel photography called?
- Can I take good hotel room photos with just a phone?
- What time of day is best for photographing hotel interiors?
- Do I need permission to photograph inside a hotel?
- How do I keep vertical lines from leaning in a photo?
- What are the most common travel photo mistakes in hotel rooms?
- Conclusion: Start With One Room and One Story
What You Need
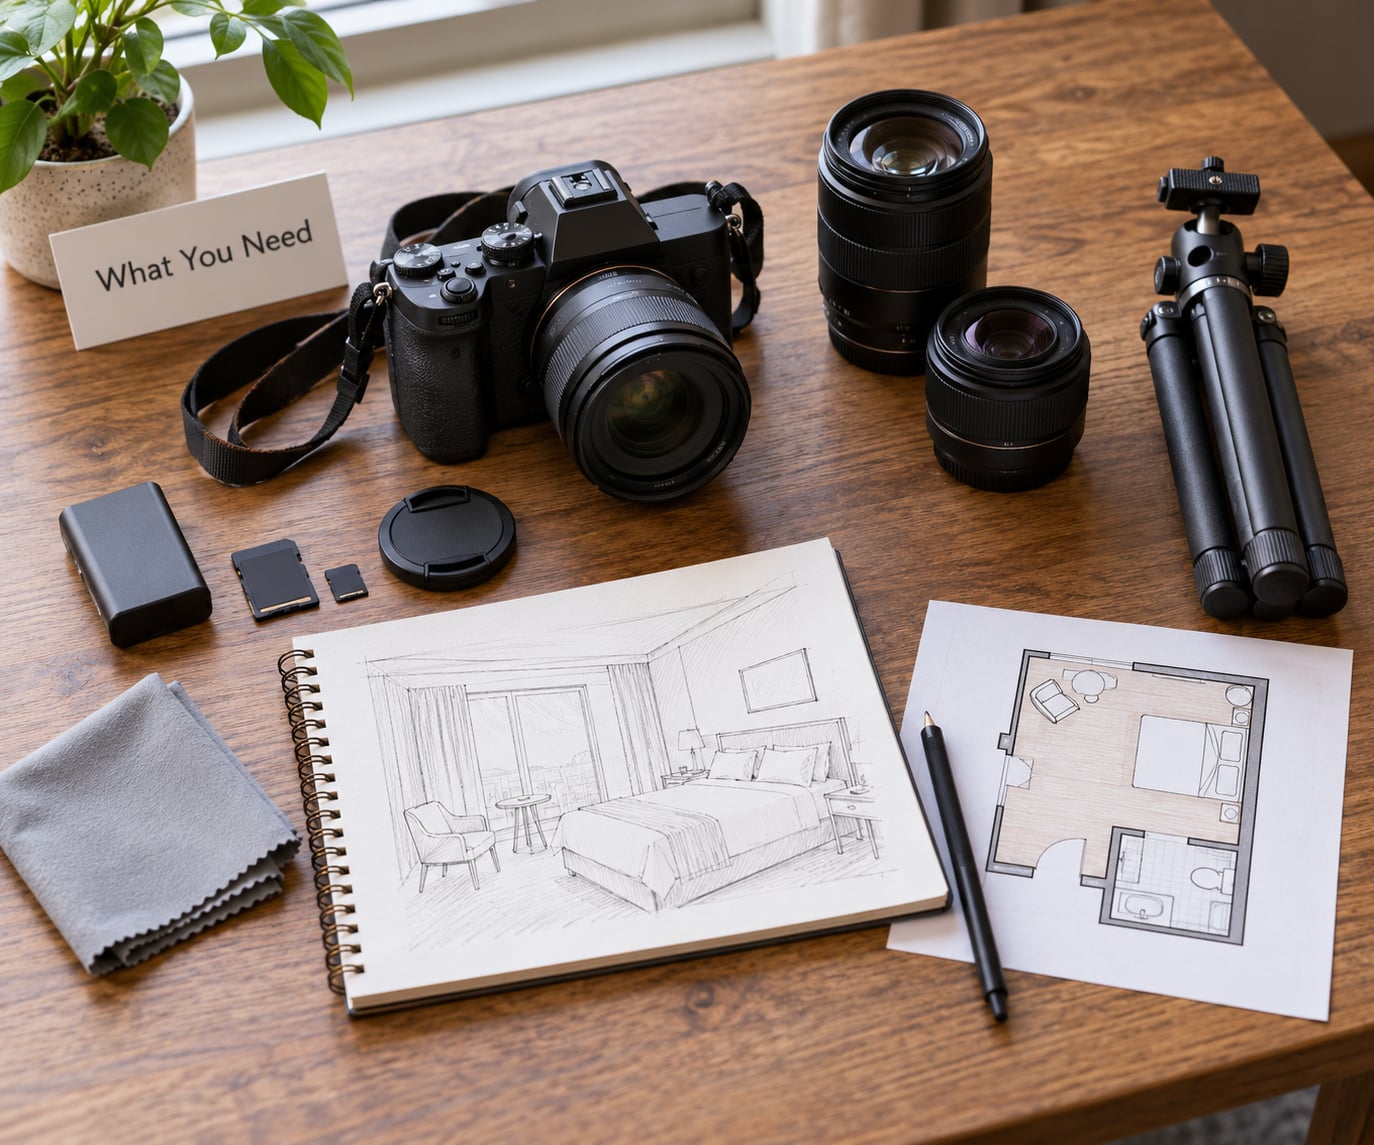
A phone is genuinely enough. Every technique below works on a phone, and for rooms under about 200 square feet the gap in results between a phone and a full-frame camera is smaller than the gap between a tidy room and a messy one.
- Camera or phone. On a phone, clean the lens with a cloth first. It is the single biggest reason interior shots look soft.
- Wide-angle capability. Most phones default to about 24mm equivalent, which is the right place to be. If you use a dedicated camera, do not go wider than 24mm.
- Something to steady the camera. A small tripod, a paperback, or a stack of books near the window. Phones with a two-second timer let you prop the device on a shelf.
- Lens cloth and a spare battery. Cold rooms and cold mornings drain batteries faster than you expect.
- A room sketch. Draw the door, the window and the biggest furniture in twenty seconds. It tells you which corner will show the most.
- Permission. A yes from the front desk or owner, and a clear rule about what you may move.
The preparation that matters most is not gear. It is understanding the space before you lift the camera: where the light enters, where you can stand, and what single thing you want the room to be about.
Here is the cheat sheet. Two columns, because most of this audience shoots on a phone.
| Setting | Phone | Mirrorless or DSLR with 24mm |
|---|---|---|
| Aperture | Leave it automatic, tap the window to lock exposure, then drag exposure down slightly | f/8 or f/11 for the whole room sharp front to back |
| Shutter | Automatic, with a 2 or 3 second timer for anything on a surface | 1/15s to 1/4s on a tripod, faster with a stabilised lens |
| ISO | Automatic | ISO 100 to 400 indoors by a window |
| Focus | Tap the focal point and hold, or use the tap-to-lock with reduced exposure | Single point AF on the middle distance, then half-press to lock |
| Stability | Timer, or two elbows braced against a wall | Tripod, 2 second self timer |
| White balance | Fix it manually rather than auto | Daylight around 5200K, tungsten around 3000K, then correct in edit |
| File type | Off, so you do not spend time waiting on HDR stacks | RAW if the camera has it |
Step-by-Step: How to Photograph Small Hotels and Interiors
1. Scout the Space Before You Shoot
Walk the room once before you take a single picture, and note three things: where the light falls, what the focal point is, and what you can remove.
Stand in the doorway first. That diagonal view usually shows more of the room than any other single spot, and it keeps the walls from leaning inward. Then check the window and notice what the light is actually doing at that hour. Mid-morning window light in a small property is often the best light you will get all day.
Remove distractions you are allowed to remove. That usually means your own suitcase off the chair, your charging cable off the desk, and the packaging from anything you opened. You are a guest, not the housekeeping team.
Then decide the story. Is this room about the bed, the window and the view, the bathroom, or the neighbourhood outside? One room, one story. A shot set trying to say everything usually says nothing.
A quick shot list keeps the twenty minutes from turning into aimless clicking: the wide shot from the doorway, the bed from the corner, the window and whatever is beyond it, the bathroom, one or two detail shots, and the entrance or corridor view. Six to ten frames, then stop.
2. Ask Permission and Check the Shoot Priorities
Ask the front desk or the owner before you photograph common areas, and always ask before photographing staff at work or anything with a person’s private information on it.
A polite script is enough: I write about small places I stay in, and I’d like to take a few photos of the room and the lobby for a blog post. Is that alright? Anything you’d rather I left alone? Nine times out of ten you get a yes and a helpful tip about which room looks best at a certain hour.
Ask what you can move. The honest answer in a guest room is usually: your own things, and cushions or throws that are clearly meant to be arranged. Heavy furniture is not yours to shift, and moving it is how people injure their backs in hotel rooms.
Do not photograph other guests, do not include faces of staff without asking them, and do not post room keys, documents or a guest book page with names visible in it. Some small properties also have a standing rule about commercial shoots versus personal photos, and it is worth knowing the difference.
3. Use the Hotel’s Best Light
Window light beats every lamp in a small room, and in a small property the best window is often not in your bedroom. The front door, the corridor window and the stairwell often carry better light than the bedroom you paid for.
Open the curtains fully, then kill the overhead lights. Lamps and ceiling fixtures in older properties run warm, and mixing that with daylight gives you a room that looks slightly sick. Turn them off and let the window do the work.
If the light is too hard, draw the sheer curtain across the window and shoot toward it. You get a soft, even wash across the room and far gentler shadows on the bed. If it is too soft and flat, push the curtains wide and shoot at the brightest part of the day.
Watch the window itself. Small rooms usually have a window that is far brighter than the interior, and a standard exposure gives you a white rectangle and a dark room. Exposure compensation of about minus one third to two thirds of a stop, or dragging the exposure slider down on your phone, fixes most of it.
If you must use artificial light, keep it to one source. Mixing a ceiling fixture with a bedside lamp and a window produces three colour temperatures and a room nobody can picture accurately.
4. Compose Rooms as Stories, Not Empty Boxes
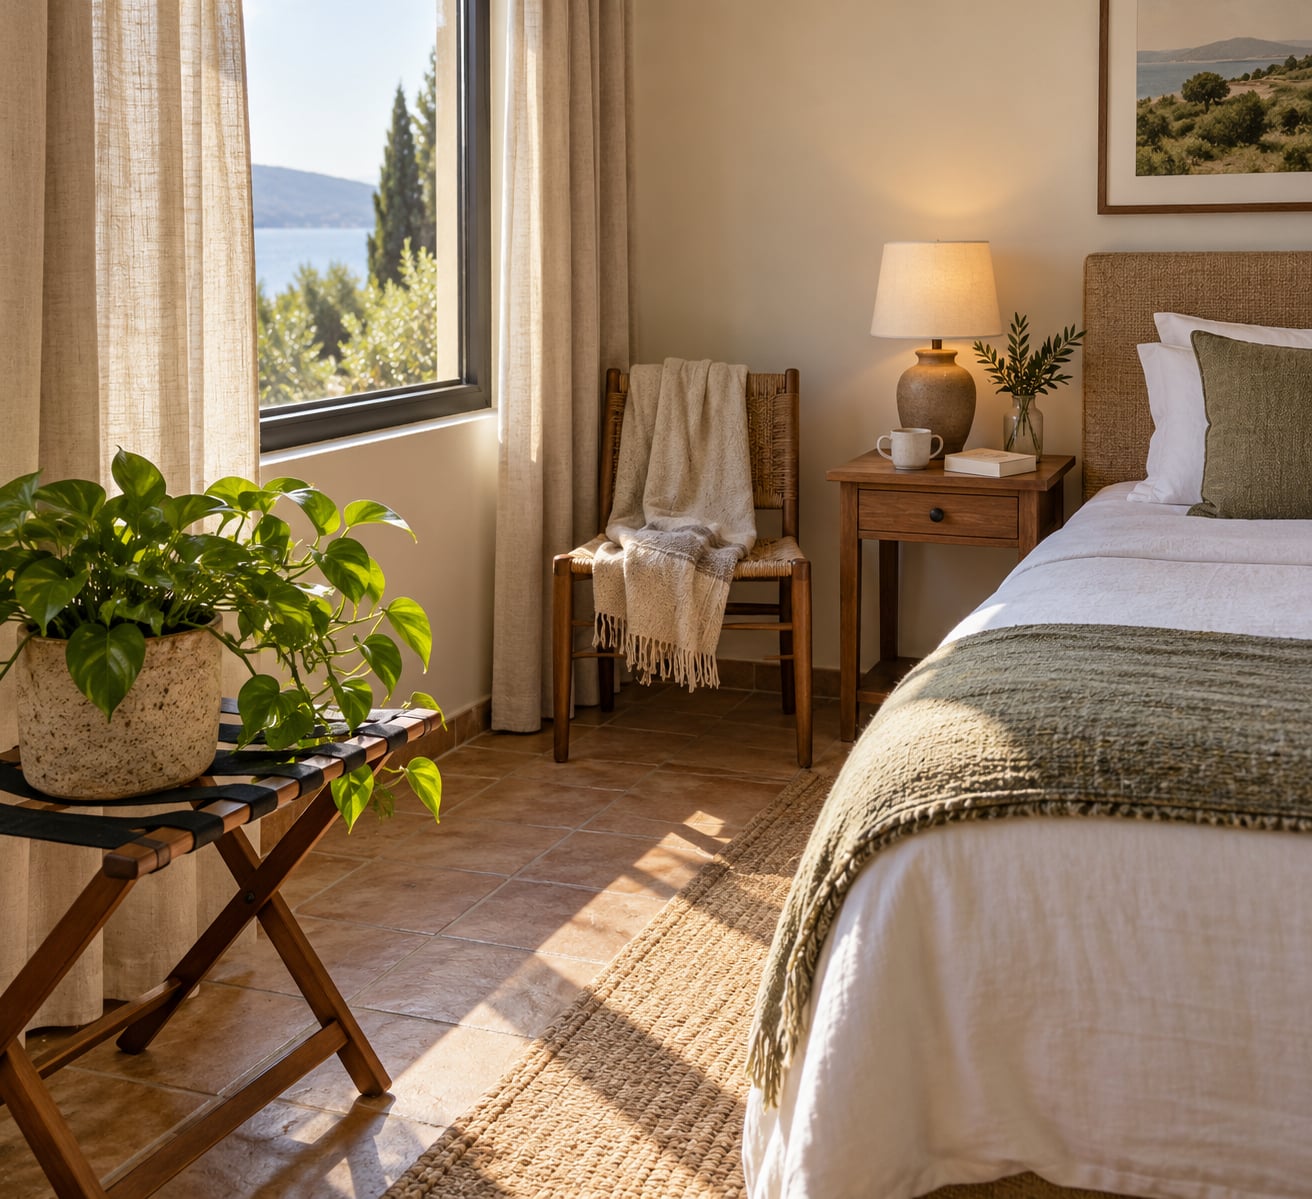
A small room photographs as a box the moment you stand in the middle of it and point at the far wall. Move to the corner, shoot diagonally, and give the frame a foreground and a focal point.
Good foregrounds in a guest room: a chair back with a folded throw over it, a plant on a luggage rack, the edge of a doorway, a cup and a book on the desk. Pick one, place it in the lower third of the frame, and let the room recede behind it.
Keep verticals vertical. Hold the camera level, not tilted up or down, and step back until the door frames the wall rather than converge on it. If you are not on a tripod, a quick two-handed brace against a door frame removes most of the lean before it starts.
Then leave the subject room to breathe. Walls close in on a photo faster than they close in on you, so give the main object space on the side it faces rather than centring it by default.
5. Shoot a Wide Shot and Several Details
A usable set has four kinds of frame: one establishing shot of the room, two or three design details, one texture close-up, and one human-scale frame showing how the space gets used.
The establishing shot comes from the doorway, lens at 24mm or wider, room square to frame. It is the frame readers will judge the property on, so spend the most time on it.
Details are where a small hotel shows its character and where most travel posts go wrong by photographing everything from the same standing height. The key fob, the doormat, the local art on the wall, a shelf of paperbacks, the tea tray, the tiled bathroom floor, the breakfast spread on the table. Move closer, change your height, shoot a texture flat against the surface.
The human-scale frame is the one most people skip. A bed with a book and reading light, a chair with a cup, a table set for two. It gives the room a sense of size and use that an empty wide shot cannot.
Always photograph the view from the window, even when the view is a car park. Readers check it, and honesty is the point.
6. Edit for Consistency and Accuracy
Edit in a fixed order so every photo in the set looks like it came from the same visit: exposure, white balance, contrast, highlights, shadows, perspective, then selective colour.
On a phone, pull highlights down until window detail is visible, lift the shadows slightly so corners are readable, straighten verticals using the perspective or correction tool, and warm the white balance a touch if the room looked grey. On a computer, work on RAW if you shot RAW.
Compare frames in groups rather than one at a time. Inconsistency between photos is what makes a set look sloppy far more than any single imperfect shot.
Then stop. A small amount of dehaze on a hazy room is fine; adding contrast, saturation and a heavy clarity slider on top of it turns a 20 square metre room into a mansion. If you have to correct a wall twice, you have gone past accurate.
The first 20 minutes after check-in
Here is the sequence I run, in order, when I have limited time: walk the room and sketch it, ask permission, open the curtains and switch off the lamps, shoot the doorway wide, shoot the wide again from the second corner, shoot the window and the view, shoot three details at different heights, shoot the bathroom, set a ten-second timer and take one framed, symmetrical bed shot, then check the frames on screen and fix anything blown before you unpack.
That is ten frames in about twenty minutes, and eight of them are usually usable.
Common Mistakes and How to Fix Them
These eight come up in almost every small hotel set. Each one has a correction you can apply in the moment, and a habit that stops it happening next time.
- Leaning walls. The camera was tilted rather than level. Fix it in the moment by stepping back and holding the frame square; fix it later with the perspective tool. Habit: check the horizon line before every wide frame.
- A blown white window. The camera metered for the interior. Expose down until the window holds detail. Habit: lock exposure on the window, then drop it a stop.
- Mixed colour temperatures. Warm lamps plus daylight made everything look ill. Switch off every fixture you can reach. Habit: turn off the ceiling light first, always.
- Clutter you were not allowed to move. Shoot around it rather than beside it. Change your angle, use a tighter frame, and let a plant or a lamp act as a screen. Habit: photograph the object as a detail so it stops looking like clutter.
- Over-wide lenses. Anything below 24mm equivalent bends straight lines and inflates the room. Stay at 24mm or go back and use a longer lens from the doorway. Habit: check the focal length once per room and stay there.
- Too much editing. A second pass of clarity, contrast and saturation changed the room. Grade once, compare against the unedited frame, and back off. Habit: decide your look before you start a set.
- Settings changing mid-shoot. Auto exposure drifted between frames, so the set has no consistent tone. Lock exposure and white balance before the second frame. Habit: check the first frame’s settings and copy them.
- The same standing height for everything. Every photo came out chest-level and flat. Drop to a crouch, stand on tiptoe, aim the camera at a table. Habit: change your height for every third frame.
One more problem deserves its own note: reflections. Photographing through a window or a glass door often captures you and the room behind you, which forum photographers have complained about for years. Stand slightly to one side so your reflection leaves the frame, press your jacket or a shoulder against the glass to kill the double reflection, and shoot during the brightest part of the day when the contrast between inside and out is lowest.
Frequently Asked Questions
What is hotel photography called?
Photographing hotels is generally called hospitality photography. Room shots made for booking pages sit closer to real estate and interior photography, while room shots made to support a review or a blog story are editorial travel photography. The technique overlaps heavily; only the purpose changes what you choose to frame.
Can I take good hotel room photos with just a phone?
Yes. Clean the lens, open the curtains, switch off the room lamps, stand in the corner opposite the window and shoot at about 24mm equivalent, which is close to what a phone uses by default. Tap the window to lock exposure, then drag it down slightly, and use the timer for anything resting on a surface.
What time of day is best for photographing hotel interiors?
Late morning to early afternoon gives the strongest window light in most small properties, and curtains give you control over it. Early morning and the hour before sunset give softer, warmer light for exterior and corridor shots. Shoot common areas early, before other guests are moving through them, and save the bedroom for the bright window hours.
Do I need permission to photograph inside a hotel?
You are a guest, so ask before photographing common areas, staff at work, or anything showing private information. A short request to the front desk or owner usually gets a yes and useful advice about the best light. Never photograph other guests, and leave guest books, key cards and documents out of frame.
How do I keep vertical lines from leaning in a photo?
Hold the camera level rather than tilted, step back until the doorway frames the far wall, and brace your elbows against a wall if you have no tripod. Keep your lens at 24mm equivalent or longer. Small corrections in the frame cost nothing; large ones in editing crop away the room you wanted.
What are the most common travel photo mistakes in hotel rooms?
The recurring ones are tilted walls, blown-out windows, mixed colour temperatures from lamps left on, clutter you did not have the right to move, lenses wider than 24mm, and heavy editing that inflates a small room. Each has a simple fix: level the frame, expose down, switch off the fixtures, change your angle, and grade once.
Conclusion: Start With One Room and One Story
Spend five minutes scouting a single room, choose one thing the room is about, then take one wide frame from the doorway and three details at three different heights. Edit them as a set with the same exposure and white balance. That routine does more for your travel photos than any camera upgrade, and it stays honest, which matters more than impressive.
If you want a habit to keep, make it this: one room, one story, one wide frame and three details before you unpack. Learning how to take better travel photos of small hotels and interiors comes down to that routine repeated on every trip rather than to a better camera, and the photographs stay true to the place, which is what readers are actually checking when they scroll your set.